Saturday, October 12, 2013

Painted Nebula Tee - A Look at the Process

My last post was all about the finished product. This post is all about the process. There are a lot of tutorials out there on how to paint your garment to look like a Hubble composite image, and I am just expanding on what I've learned from them. Everyone goes about it in slightly different ways...this is my take.

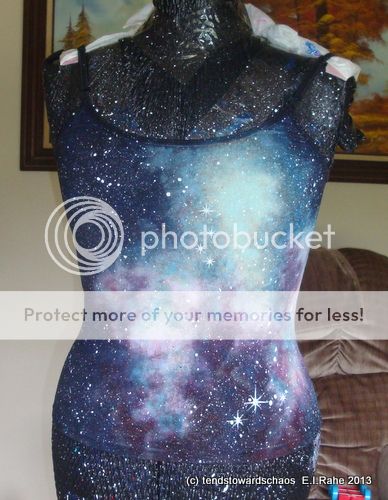
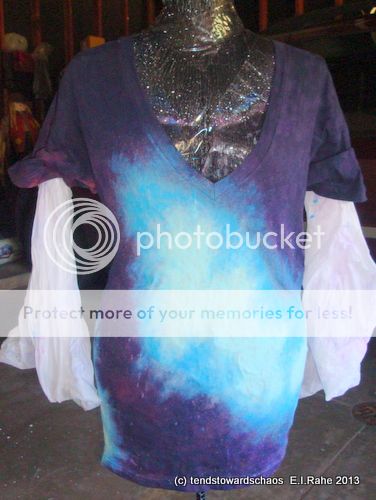
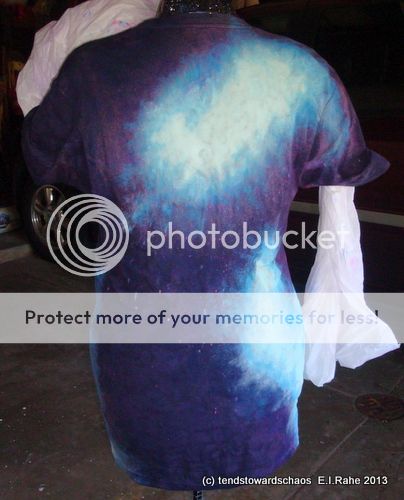
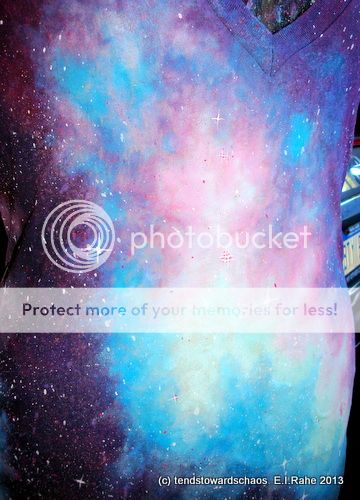
My most recent shirt started out as a navy blue, sheer jersey tee with a deep-V neck from American Apparel.

My dress form is covered with a garbage bag - to keep it safe from bleach and paint - with the gaps between sections being reinforced with packing tape, and 'sleeves' from two more bags taped to the shoulders.

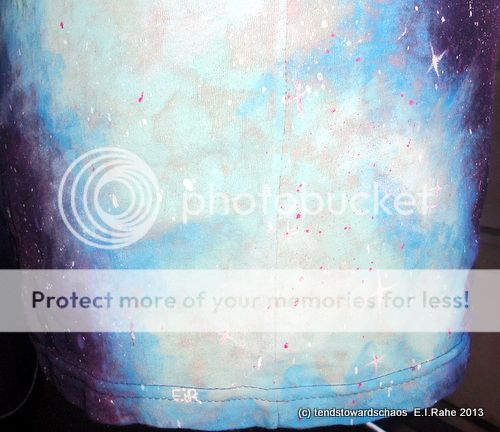
I use a 50/50 mix of bleach and water to bleach out sections of the shirt where I want to use a light-colored paint. The garment should be washed and dried first, or the fabric may not absorb the bleach/water, causing it to streak. Go easy on the bleach! More can always be added later, but it can't be taken away. This fabric wicked the moisture away so quickly that I ended up with larger bleached sections than I intended. I made it work.

Once it's bleached, I let it dry completely. I rinse it in cool water with a bit of vinegar to stop the bleaching action. Washed, dried, and back on the dress form.

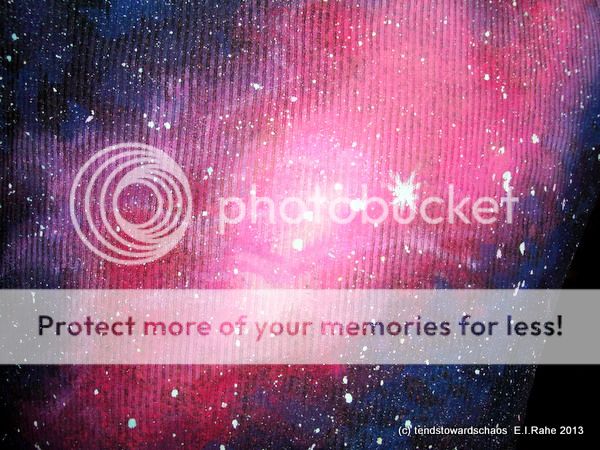
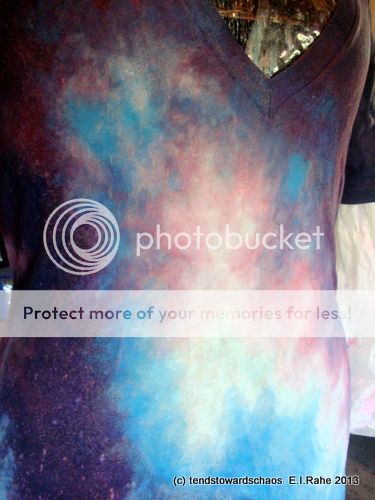
Mix the paint! I use acrylic paint mixed with textile medium. The first color is a deep purple, diluted with water (something like 50/50 by volume worked for me). I use a round cosmetics sponge and start by filling in the darkest areas. The entire black area doesn't need to be covered, it should look splotchy.
Next, using a water-diluted, dark blue, I blended the purple into the lighter sections...the blue approaches, and sometimes creeps into the bleached out areas. It looks like this:


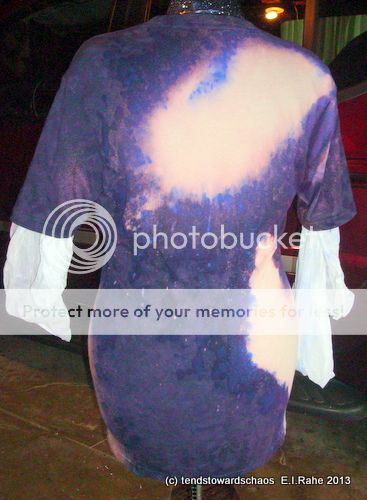
The next color layer is a medium turquoise (or medium shade of whatever color you want, like pink). Again, it's diluted with water to make it translucent when applied. This color blends the blue into the light areas, and should extend into the bleached-out section. In the next photo, you'll see that I've started to add the turquoise on the right, but not on the left (see where the blue barely infringes on the bleached-out area?).
These photos show the turquoise completely surrounding the bleached section, and blending into and overlapping the blue:

Then, I used a very light blue/turquoise (or pink, if that's your colorway), diluted with water, to fill in the majority of the bleached-out areas. It's blended into the turquoise, and even a little into the blue and purple.
The next step took some guts, because this is when I switched colors and painted a contrasting layer to the nebulae. I used a medium to dark red, diluted, to add another layer of 'hot gases.' I added this color everywhere except the center-back of the shirt.
Using a diluted, light pink, I blended the red into the surrounding colors and created more highlights.
Using diluted, white paint, I added highlights within the nebulae and created the spiral in the galaxy (center-back).


That takes care of the sponge-painting portion of our craft-along!

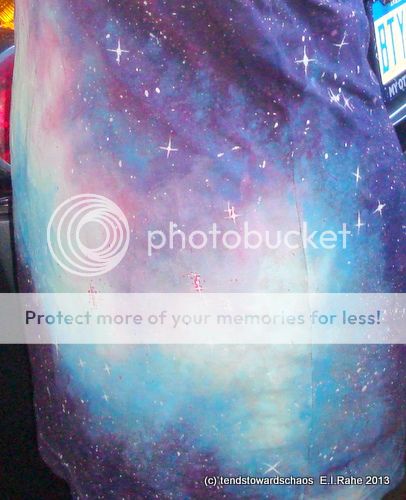
Now, it's time to get out the drinking straws and some cups.

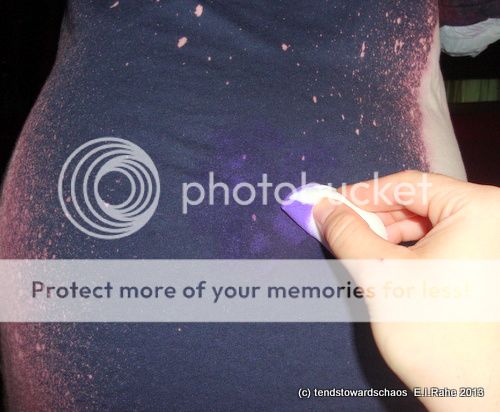
I mixed my paint/textile medium up in cups. I used several colors...white (obviously), dark pink, turquoise, light blue. This time around, no dilution necessary. The colors need to pop! I dip the end of the straw in paint, knock off a bit of the excess on the sides of the cup, then...blow. Instant stars!


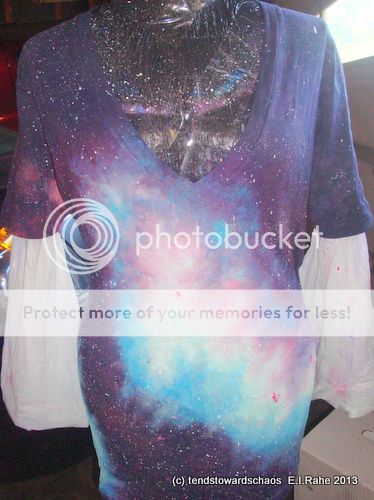
I inevitably get strange splatters, drips, and clusters.

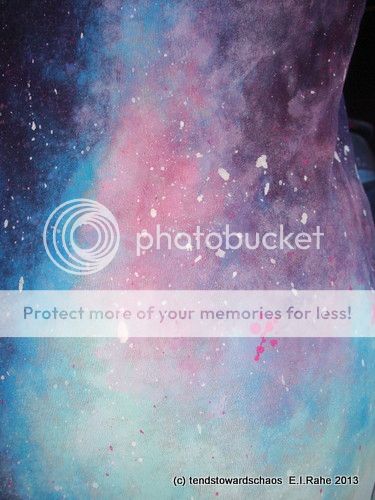
They just become the brightest stars in the sky...with the help of a very tiny paintbrush.
And, I'm spent!
After the paint is dry, the shirt needs to come off the dress form and the paint needs to be heat-set. I cover the shirt with a pillowcase and iron it on whatever setting is appropriate for the fabric. After setting the paint, the shirt can be washed and dried as usual. The more it is laundered, the softer it gets.

My color palette, if you're interested:


Monday, September 9, 2013

I've got my head stuck in the clouds (of hot gases in space...)

I saw an awesome tutorial (here) in my Facebook feed that I just had to try for myself. I had this wonderfully comfortable long-sleeved tee...with a big ol' stain right over my bellybutton (my pregnant self stuck her belly into her plate of food, methinks). Yay! A way to make it wearable again! I'll turn it into a picture of galaxies, stars, and nebulae from Hubble! Sort of.

So, I bought some paint and bleach, and away I went!


And, the wonderful people over on Craftster.org voted it the winner of the 10th Anniversary Challenge: Clothing Category! I received some awesome swag, and I also have an awesome shirt! Made of win.

Talk about positive reinforcement.


I just haven't been able to stop.

See.

#2


And, #3.


And, I also made a cute little bunny. He's just like one I made for my son. He's made from an upcycled wool sweater, printed cotton, and stuffed with wool. You can buy him here.


I have been wanting to take in-process photos of the galaxy/nebula shirts, but my camera battery always seems to be dead. Next time, though...


Wednesday, May 1, 2013

Better Late Than Never

I have a lot of projects that are half-done right now. I'm really bad at starting something new while trying to simultaneously complete the dozen other items that are languishing in my craft room. In the last 6 months, I may have completed four or five projects, but started ten.

*sigh*

So, here's one of the completed things...of course, it wasn't totally finished when I took pictures. This bear actually has a bow tie, too. We call him Mister Bear.

Mister Bear is made from up-cycled wool sweaters and stuffed with wool. The pattern is mine.

My little dude got him from Santa at the family Christmas party...his first gift from Santa Claus! Santa's elves even embroidered his name on the bear.

Sunday, April 14, 2013

Re-Opening Shop

No. Not quite yet. I'm still putting the finishing touches on my stuff...

But, I'm supercalifragilistic-excited-as-a-school-girl about re-opening! I literally have to reconfigure and then upload a few files, and that is it, my friends. I will be back in business!

What, you might ask, will be available in my shop?

Why, hand embroidery patterns, for starters.

Exciting? No?

They're not just any patterns, though! They're based on the incredibly intricate and frivolous floral designs that were popular around the time of the American and French revolutions. Marie Antoinette and Thomas Jefferson, eat your hearts out!

Still not doing it for you?

Okay, some of them also contain adult language.

That got your attention!

Yup. Some of these intricate floral designs (perfect for silk embroidery!) frame popular expletives. For example: Motherfucker, Cunt, and Muff Garbage (okay, that one is a South Park reference...the Jersey Shore episode).

Why cuss words?

My mother hated them. She'd get her panties in such a wad every time one of these beauties passed my lips. I don't know how I often I heard it... "You're so ugly when you say that word!"

*snort*

I don't think that they're ugly words. I think they are powerful words. Powerful because some people are afraid to say them!

I'm really curious what your favorite power words are. Please, share them in the comments - I'd love to hear them!

Edited to say: My shop is open! Come and get your daily dose of snark! Or, you know, flowers...

Sunday, April 7, 2013

Hello, My Name Is...

Hello. My name is Erin, and I am an artist.

Well, I make things.

Lots and lots of different things.

I used to be a chemist, so I'm a bit nerdy, too.

Check out my old blog, and stick around for more fun.